Written by Alexandra Blanck, Content Manager at Esko
Alexandra Blanck, a member of the Esko Corporate Marketing team, is known for her dedication to crafting engaging content that resonates with global audiences.
Key Takeaways
Flexo prepress is genuinely different from offset or digital printing. Plate physics, dot gain variability, and substrate range mean it carries more process-specific decisions than most print environments
Prepress and press makeready are separate stages with different failure modes. Conflating them makes problems harder to diagnose
Every stage affects the next. Errors compound as they move downstream, and catching them early is always cheaper
Trapping, screening, and color management must be calibrated to the actual press and substrate combination, not a theoretical standard
The handoff between prepress and the platemaking room is a common failure point. Automating it removes ambiguity and reduces errors
Reliable flexo prepress is not about individual expertise. It is about process discipline and structured workflows that deliver consistent results at scale
What Is Flexo Prepress?
Flexo prepress refers to all the technical preparation work that happens between receiving a design file and producing a press-ready flexographic printing plate. Every print process has a prepress stage.
What makes flexo different from other prepress processes is how many of its critical variables are process-specific, and how directly those variables affect the outcome on press.
In offset, plates are relatively standardized and dot gain is predictable and well-documented. In digital printing, there is no plate at all. Flexo sits in a different position.
The plate stretches and compresses around a cylinder. Dot gain is wider and less consistent than in offset, varying with ink viscosity, anilox volume, impression pressure, and substrate. Registration tolerances are generally looser. And flexo runs on a far broader range of substrates than most other processes, each behaving differently under ink.
This means prepress in flexo carries more process-specific decisions than in most other print environments.
The preparation work covers:
Checking files for errors
Adapting artwork for the specific characteristics of flexo printing
Managing color separations
Applying trapping
Selecting screening parameters
Generating proofs
Producing the data used to image flexo plates
These are not independent steps. Each decision affects the next, and errors compound as they move downstream. Understanding that chain of dependencies is what separates a reactive prepress operation from a proactive one.
For packaging-focused operations,Esko’s trade shop and premedia solutions bring together the core elements of flexo prepress, including platemaking, color management, and approval workflows, into a connected and manageable process.
Where does Flexo Prepress Fits in the Flexographic Printing Workflow?
Flexo prepress sits between artwork creation and press production. In a typical packaging workflow, the sequence looks like this:
Brand owner or agency creates and approves artwork
Prepress team receives the file and begins technical preparation
Files are preflighted, adapted, color-separated, and trapped
Proofs are generated and approved
Plate-ready files are sent to the platemaking room
Plates are imaged, processed, and mounted on press
Press run begins
Each stage depends on the quality of what came before it. Prepress is where the most technical decisions are made and where the most errors can be caught before they become expensive.
A well-structured prepress workflow does not just process files. It validates them, transforms them for the specific print conditions, and produces output that is predictable and repeatable.
Automating key steps within this workflow, such as preflight, trapping, imposition, color management, and reporting, significantly reduces manual effort and the risk of human error.
Why Flexo Prepress Matters for Print Quality, Consistency, and Waste Reduction
Poor prepress preparation has direct consequences on press.
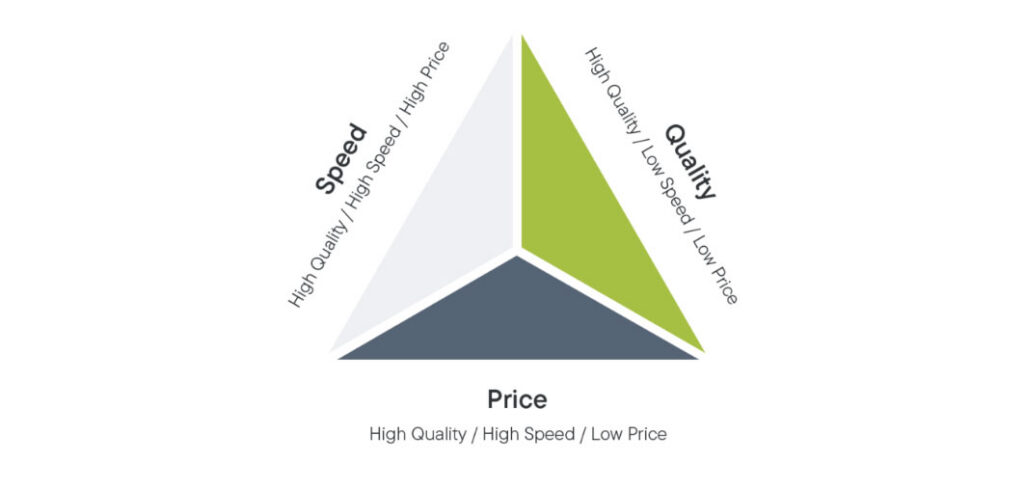
As discussed in this article, it is near impossible to achieve all three things in the triangle below. Any combination of 2 is achievable, but workflow automations and good prepress processes can help balance all 3 priorities.
Dot gain that was not compensated for leads to darker, muddier prints. Trapping that was not applied correctly leads to visible gaps at color boundaries when registration shifts. Color separations that were not profiled to the actual press conditions lead to proofs that do not match the printed result.
These are not minor inconveniences. They translate into makeready time, substrate waste, ink waste, and in some cases, full reprints. For high-volume packaging converters, the cumulative cost of prepress errors is significant.
The impact is felt differently depending on who you are.
A single-site converter producing short-run labels for food and beverage brands may face frequent job changeovers, where each makeready failure directly compresses margin.
A regional flexible packaging group running longer runs across multiple presses has more at stake in terms of total waste volume, but also more capacity to absorb individual failures without noticing the pattern.
That is precisely why structured prepress practice matters more as operations scale: the problems become harder to see, not easier.
Strong prepress practice addresses these issues before they reach the press.
Real-world results demonstrate these gains clearly. Polytec’s experience shows how improved plate consistency, better highlight control, reduced makeready time, and lower ink usage are all achievable outcomes of a more disciplined flexo prepress approach.
The first step in any prepress workflow is receiving the artwork file and checking it for technical errors before any further work begins. This is called preflight.
Preflight checks verify that the file meets the technical requirements for production. Common checks include:
Color mode and spot color definitions — are all colors correctly specified?
Image resolution — are all placed images at sufficient resolution for the intended output?
Font handling — are fonts embedded or outlined?
Bleed and safe zones — does the artwork respect the structural requirements of the packaging?
Barcode integrity — are barcodes correctly sized, positioned, and readable?
Overprint settings — are overprints applied correctly to avoid unexpected color interactions?
Manual preflight is slow and prone to inconsistency. For a small team handling dozens of jobs per week, manual checking is also a bottleneck that delays everything downstream.
Automated preflight tools can check hundreds of parameters in seconds and generate detailed error reports that guide the prepress operator through what needs to be fixed. Esko’s packaging preflight solution handles automated file validation with error reporting, barcode checks, and die-cut-aware validation, making it well suited to the complexity of packaging files.
Catching errors at intake is always cheaper than catching them later in the process
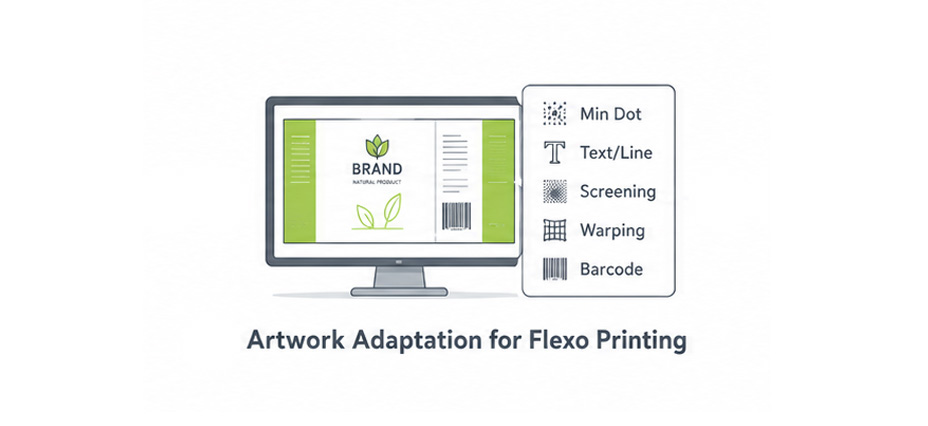
Artwork Adaptation for Flexo Printing
Once a file has passed preflight, it typically needs to be adapted for the specific requirements of flexo printing.
Artwork created for digital or offset printing does not automatically translate well to flexo. The characteristics of the process, including plate compression, ink viscosity, anilox volume, and substrate behavior, require specific adjustments.
Common artwork adaptation tasks include:
Minimum dot size adjustments to ensure fine highlights do not drop out on press
Reverse type and fine line adjustments to ensure legibility after plate compression
Screening parameter selection appropriate to the print condition
Warping and distortion compensation for cylindrical plate mounting
Text and barcode optimization for flexo reproduction
For a prepress specialist working alone in a single-site converter, these adaptation tasks represent a significant portion of daily work. When they are done manually and inconsistently, the results vary by job and by operator.
Structured adaptation tools reduce that variability without requiring the operator to make every decision from scratch.
ArtPro+ is Esko’s native PDF editor designed for packaging prepress. It supports trapping, screening, text recognition, warping, and a wide range of adaptation tasks within a single environment, reducing the need to move files between multiple tools.
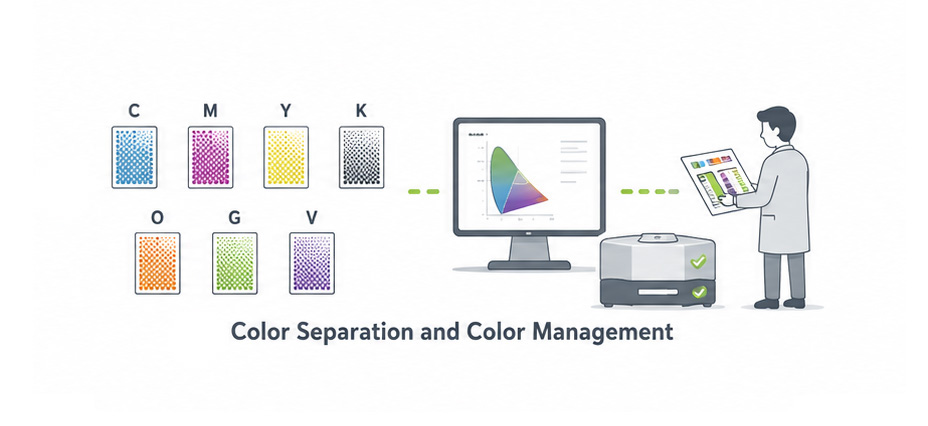
Color Separation and Color Management
Color separation is the process of converting artwork colors into the individual ink channels that will be printed. In standard flexo printing, this typically means CMYK separations, often with additional spot colors.
In expanded color gamut (ECG) printing, a fixed set of inks, typically CMYK plus orange, green, and violet, is used to reproduce a wide range of spot colors without changing inks between jobs.
Regardless of the approach, color management is critical. The goal is to ensure that the colors defined in the artwork are reproduced accurately and consistently on the specific substrate, with the specific inks, on the specific press being used. Solutions such as Esko Equinox for expanded gamut printing and Pack Proof for color-accurate contract proofing help make that consistency more achievable across flexo workflows.
This requires:
Press fingerprinting to characterize how the press actually prints
ICC profile creation based on that fingerprint
Linearization to ensure consistent ink density across the tonal range
Proof generation that accurately simulates the expected press result
Centralized color management, with shared profile libraries and controlled distribution, is how multi-site operations bring that variation under control.
Beck Atlanta’s workflow demonstrates how ECG workflows, fingerprinting, linearization, and ICC profiles can be combined to achieve reliable proof-to-press color consistency in a flexo environment.
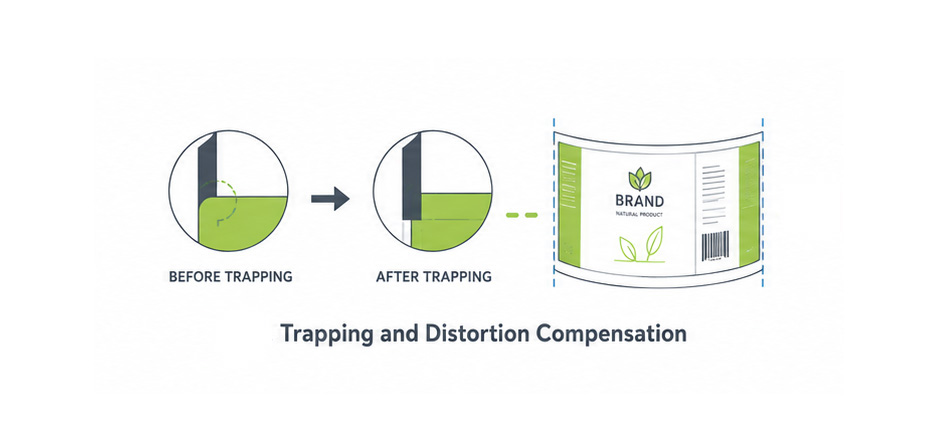
Trapping and Distortion Compensation
Trapping is the process of creating small overlaps between adjacent color areas to prevent white gaps from appearing when colors are slightly out of register on press. In flexo printing, where registration tolerances can be wider than in offset, trapping is particularly important.
Trapping decisions include:
Which color spreads into which — typically lighter into darker
Trap width based on the expected registration tolerance of the press
White underprint for printing on transparent or metallic substrates
Knockout vs. overprint behavior for spot colors
Distortion compensation addresses the physical stretching of the flexo plate as it wraps around the print cylinder. Because the plate curves around the cylinder, artwork needs to be slightly compressed in the print direction so that it reproduces at the correct size on the substrate.
There is another type of distortion which is applied in the editor, which is a compensation for curved surfaces and deformation during the converting process, like for instance Shrink Sleeve distortions, or conical neck labels. In order for the artwork to remain legible, it needs to be pre-distorted. A highly specialized task that is done in the ArtPro+ editor.
Jan de Roeck, Director Industry Relations & Strategy
In operations where trapping is applied manually, the results depend heavily on individual operator judgment. That is manageable when one experienced specialist owns the process. It becomes a liability when staff change, when jobs are handed between operators, or when the same job needs to be reproduced consistently months later on a different press.
Esko’s PowerTrapper is a dedicated trapping solution for packaging artwork that handles automated trapping and white underprint creation, reducing the manual effort and inconsistency that comes with applying trapping by hand.
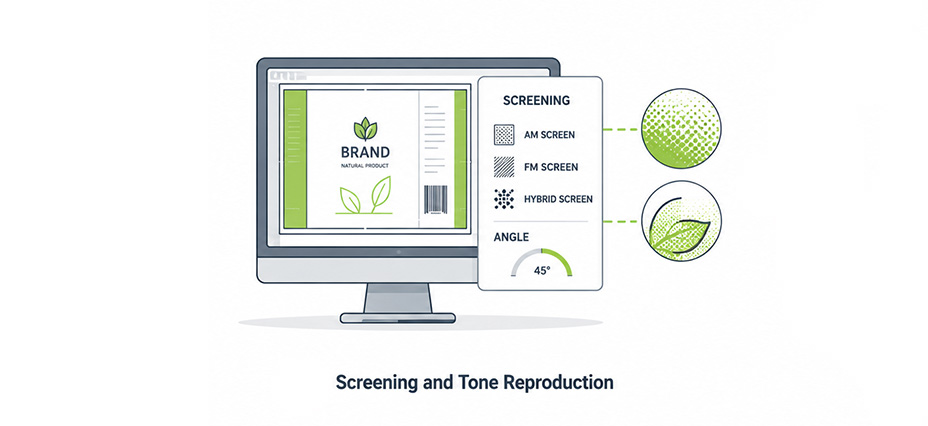
Screening and Tone Reproduction
Screening determines how continuous-tone images and gradients are reproduced using the halftone dots that make up a flexo print. The choice of screening method, ruling, dot shape, and angle has a significant impact on print quality, particularly in highlight areas and at color boundaries.
Key screening considerations for flexo include:
AM vs. FM vs. hybrid screening
Minimum dot size that can be reliably held on plate and on press
Dot shape — round, flat, or elliptical — and its effect on tone reproduction
Screen ruling appropriate to the anilox specification and substrate
Rosette pattern and moiré risk management
Screening decisions made in prepress directly influence how the plate images and how ink transfers on press. Getting these parameters right for the specific print condition is one of the more technically demanding aspects of flexo prepress.
Note: It is also one of the areas where the gap between an experienced specialist and a less experienced operator is most visible in the final print result.
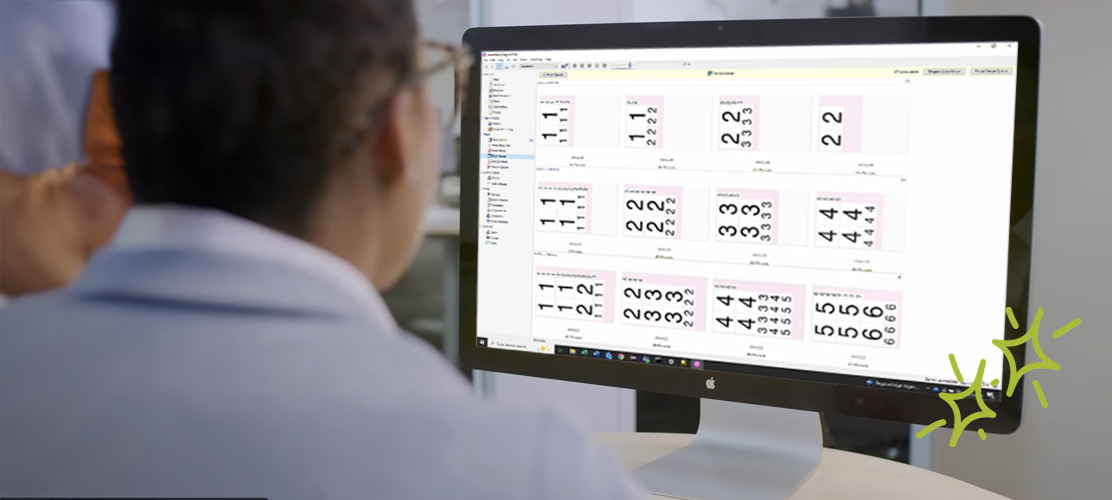
Tools such as Imaging Engine help standardize flexo-specific screening, calibration, and pre-output quality control so those decisions can be applied more consistently.
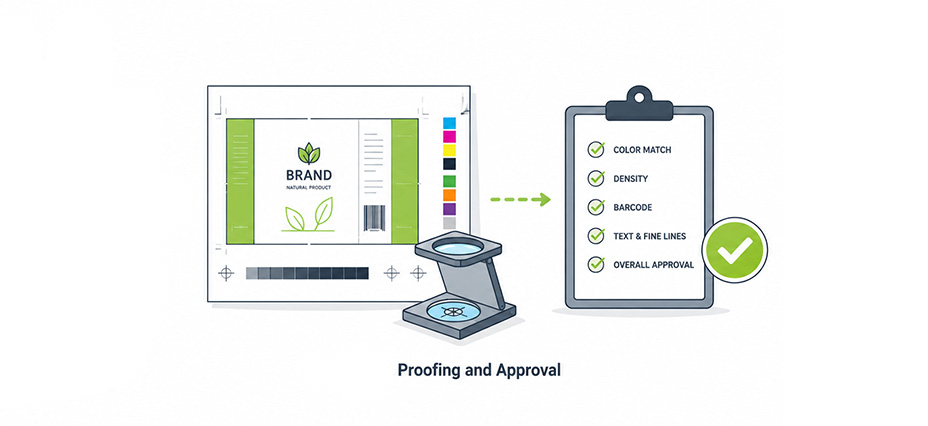
Before plates are produced, a proof is generated to simulate the expected press result. The proof serves two purposes: it gives the prepress team a quality check, and it gives the brand owner or customer a reference for approving the job.
For proofing to be meaningful, it must be accurate. A proof that does not reflect the actual press condition creates false confidence and leads to surprises on press. Accurate proofing requires proper color management, a calibrated proofing device, and a clear understanding of what the proof is simulating.
Approval workflows in packaging are often complex. Multiple stakeholders, including brand owners, regulatory teams, and print buyers, may need to review and sign off on different aspects of the artwork.
WebCenter Enterprise provides a structured environment for artwork review, annotation, approval, validation, and workflow control; giving all stakeholders a single place to manage the approval process and maintain a clear audit trail.
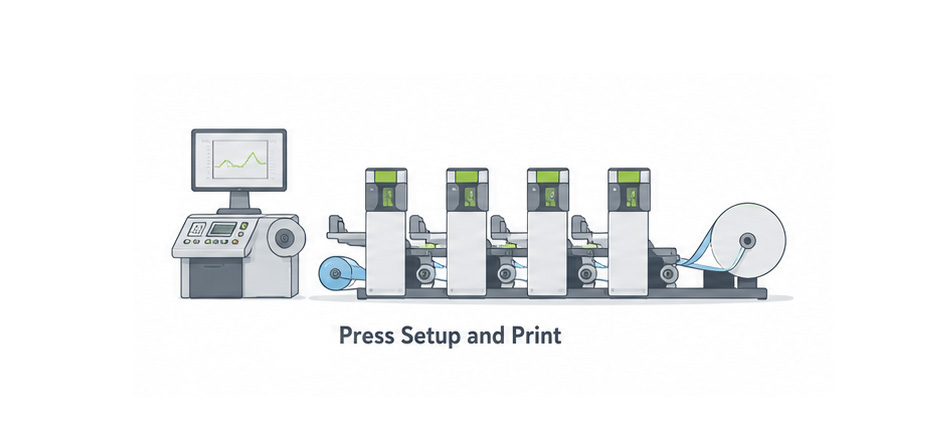
Plate Imaging and Plate Making
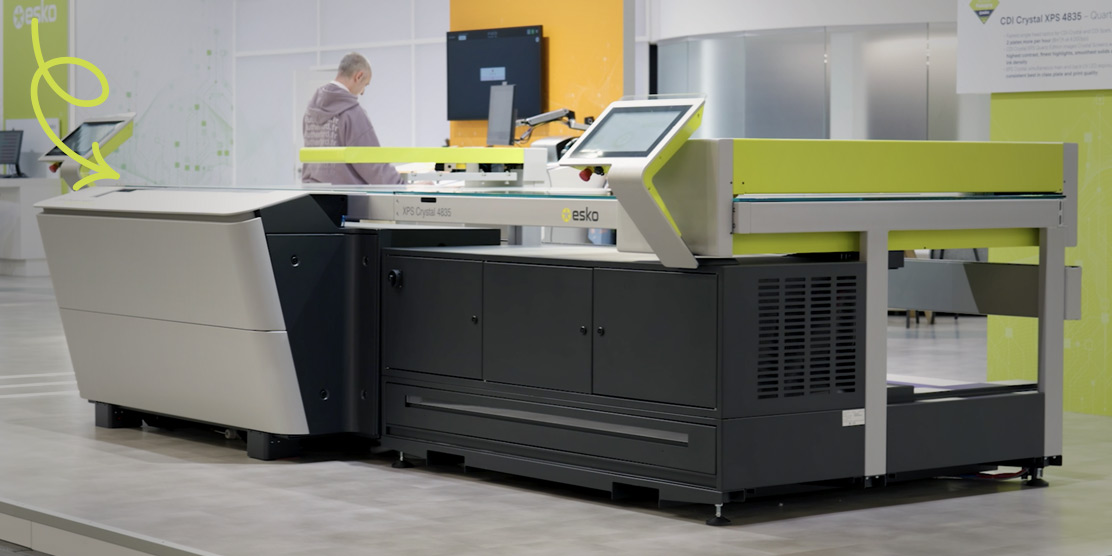
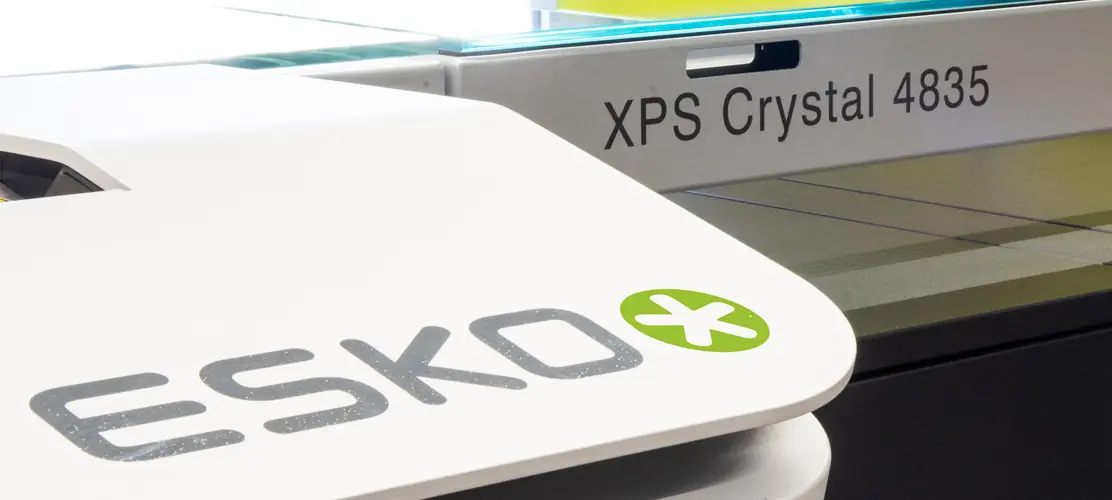
Once files are approved, they are sent to the platemaking room for imaging. The prepress file, typically a 1-bit TIFF or a screened PDF, is used to expose the flexo plate using a laser imaging device. Integrated systems such as CDI Crystal XPS further streamline this handoff by combining plate imaging and exposure in a consolidated flexo platemaking workflow.
The quality of the plate image depends on the quality of the prepress file. Screening parameters, dot compensation curves, and resolution settings all need to be correctly configured for the imaging device and plate type being used. Errors at this stage are difficult to catch without inspection and can result in plates that do not perform as expected on press.
The handoff between prepress and the platemaking room is a common failure point. In operations where this handoff is manual, files can be sent with incorrect settings, or the platemaking team may apply their own adjustments without coordinating with prepress. Connecting these two stages through a controlled, automated process removes that ambiguity.
As André Vandepitte, Prepress Manager, Reynders, Belgium, explains:
“We’ve gone from moving plates from machine to machine, to a streamlined, integrated and automated process that simply takes the push of a button to operate.”
Automating the flexo platemaking workflow connects prepress file preparation directly to imaging, exposure, and plate production, reducing manual handoffs and the risk of errors between prepress and the platemaking room.
Key Flexographic Prepress Elements to Understand
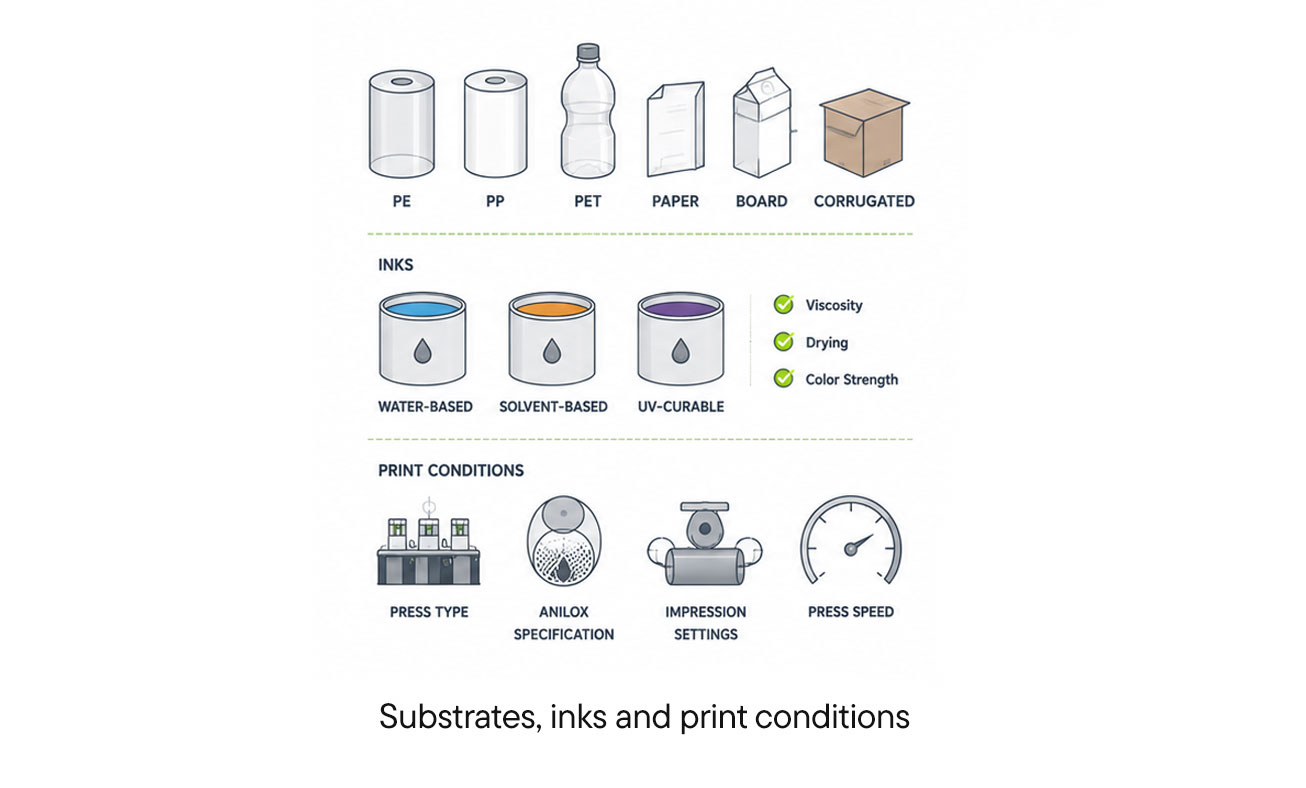
Substrates, Inks, and Print Conditions
Flexo printing is used across a wide range of substrates, including polyethylene, polypropylene, PET, paper, board, and corrugated. Each substrate behaves differently in terms of ink absorption, surface tension, and dimensional stability. These differences affect how ink transfers, how dots reproduce, and how colors appear in the final print.
Inks in flexo are typically water-based, solvent-based, or UV-curable. Each ink type has different viscosity, drying characteristics, and color strength — all of which influence how prepress parameters should be set.
Print conditions also vary by press type, anilox specification, impression settings, and press speed. Prepress parameters that work well for one print condition may not be appropriate for another.
This is particularly relevant for converters that run multiple substrates across the same press, or regional groups where different plants use different press configurations.
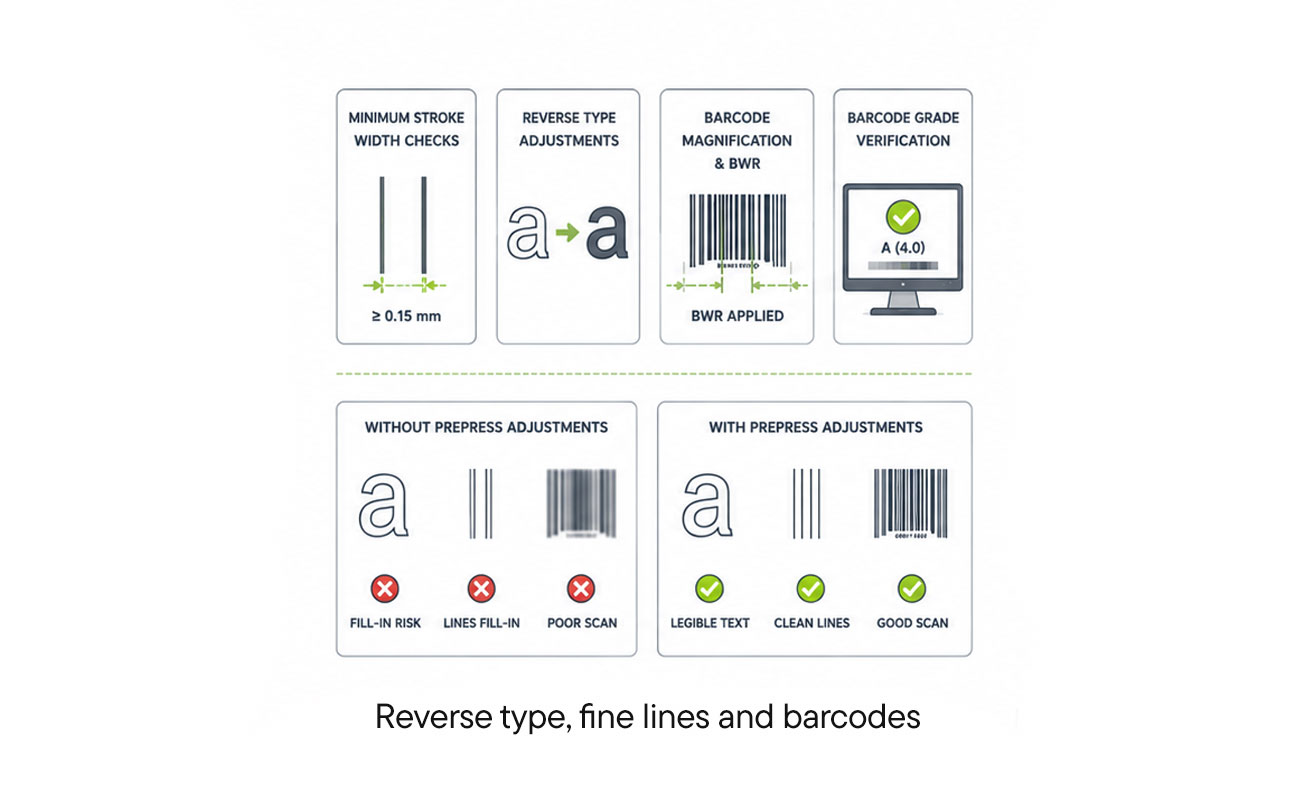
Small text, fine lines, and barcodes are among the most challenging elements to reproduce reliably in flexo printing. Plate compression, ink spread, and dot gain can all cause fine elements to fill in, thicken, or become illegible.
Prepress preparation for these elements typically involves:
Minimum stroke width checks to ensure fine lines will hold on press
Reverse type adjustments to prevent fill-in in tight counter spaces
Barcode magnification and bar width reduction (BWR) to compensate for ink spread
Barcode grade verification to confirm that the barcode will scan correctly after printing
The consequences of getting these wrong vary by segment. For a label converter supplying retail food packaging, a barcode that fails to scan at the point of sale is a serious compliance issue. For a folding carton converter producing pharmaceutical packaging, illegible small text can have regulatory implications.
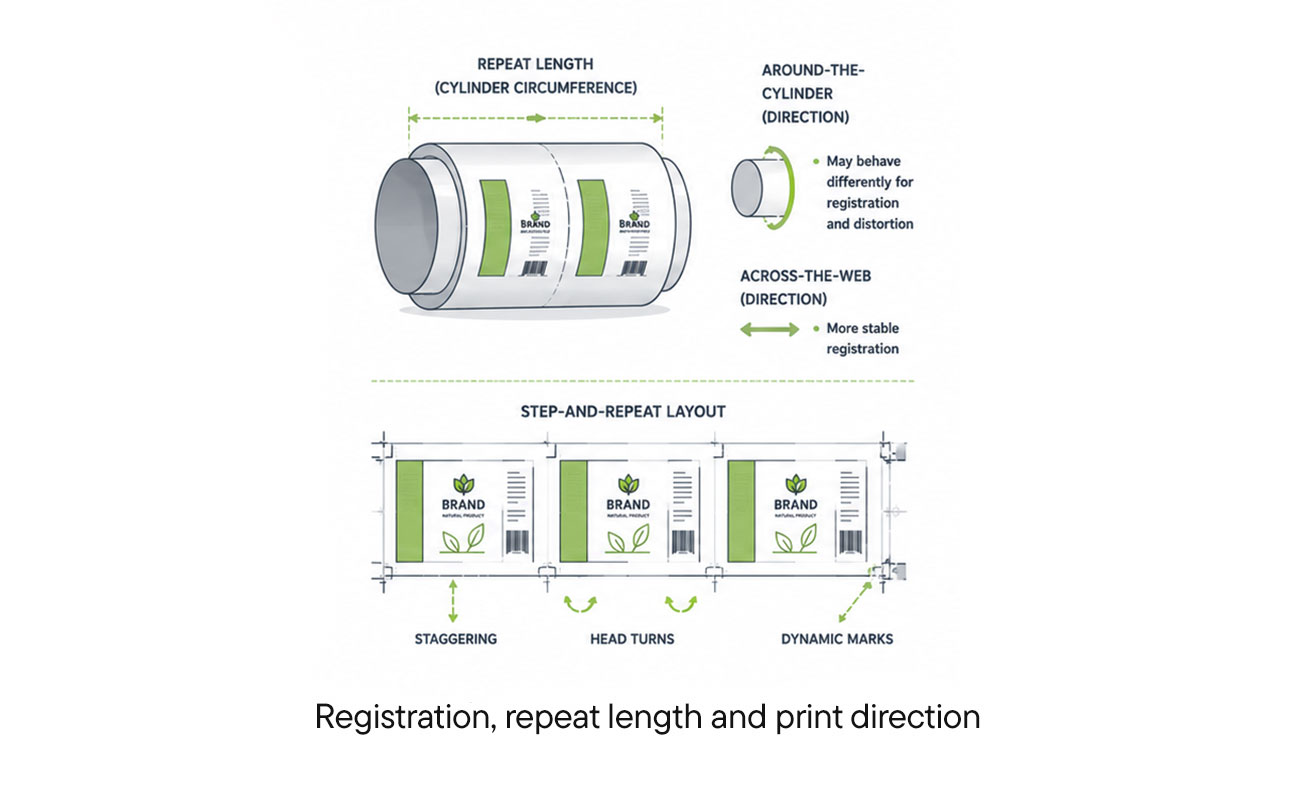
Flexo printing is a rotary process. The plate wraps around a cylinder, and the repeat length, the distance between one print impression and the next, is determined by the cylinder circumference. Prepress files need to be set up to match the repeat length of the press being used.
Print direction also matters. Elements close to the edges of the print area in the around-the-cylinder direction may be subject to different registration behavior than elements in the across-the-web direction. Understanding these spatial relationships is important for correct layout and trapping decisions.
Step-and-repeat layouts, which arrange multiple copies of a design across the plate, need to account for staggering, head turns, and dynamic marks. Esko’s PowerLayout supports step-and-repeat layouts with staggering, head turns, dynamic marks, and reusable plate layouts, making it easier to set up complex plate configurations correctly.
Common Flexo Prepress Challenges
Many flexo prepess challenges are the same as other printing processes. You can read our list of common prepress errors and how to solve them for further study.
Here we will go shortly the ones you might commonly see in Flexo processes.
Dot Gain and Highlight Loss
Rivendell’s experience with Crystal Screening illustrates how improved highlight control and better ink laydown in solids can be achieved through the right combination of screening technology and platemaking practice.
Misregistration and Trap Issues
Diagramm Halbach’s workflow improvements demonstrate how better trapping practices close misregister gaps and reduce prepress errors in a production environment.
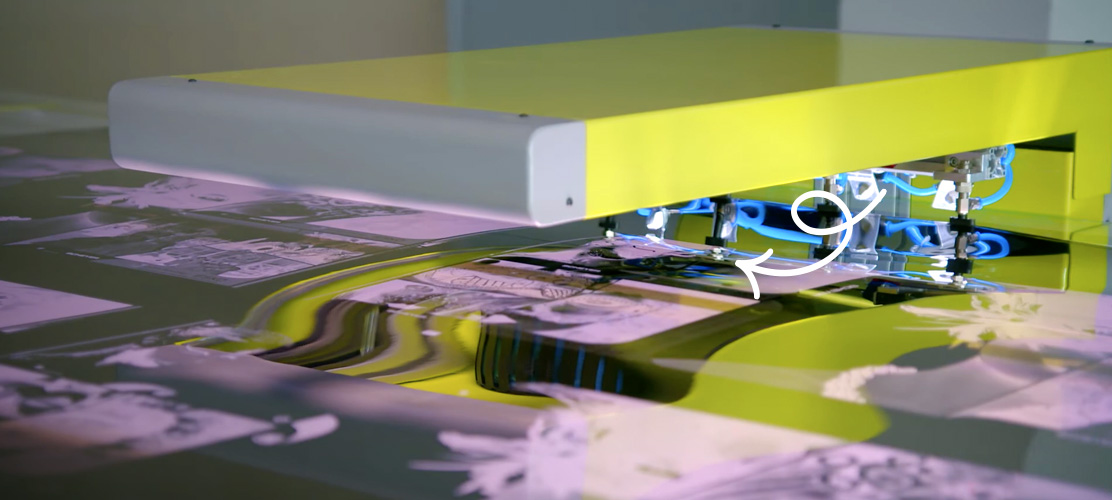
Once approved, the prepress file is used to expose a photopolymer plate via a laser imaging device, transferring the screened dot structure onto the plate material.
The plate then goes through several processing steps:
Back exposure through the unmasked side to build the dot shoulder and set plate floor depth
Main UV exposure to cure the imaged areas
Washout or thermal processing to reveal the relief structure
Drying to remove residual solvent
Post-exposure and detack to finalize the surface for consistent ink transfer
Each step needs to be controlled carefully. Variations in exposure time, processing temperature, or drying conditions affect dot size, plate hardness, and surface texture. In manually managed platemaking operations, these variations often go undetected until they appear as quality problems on press.
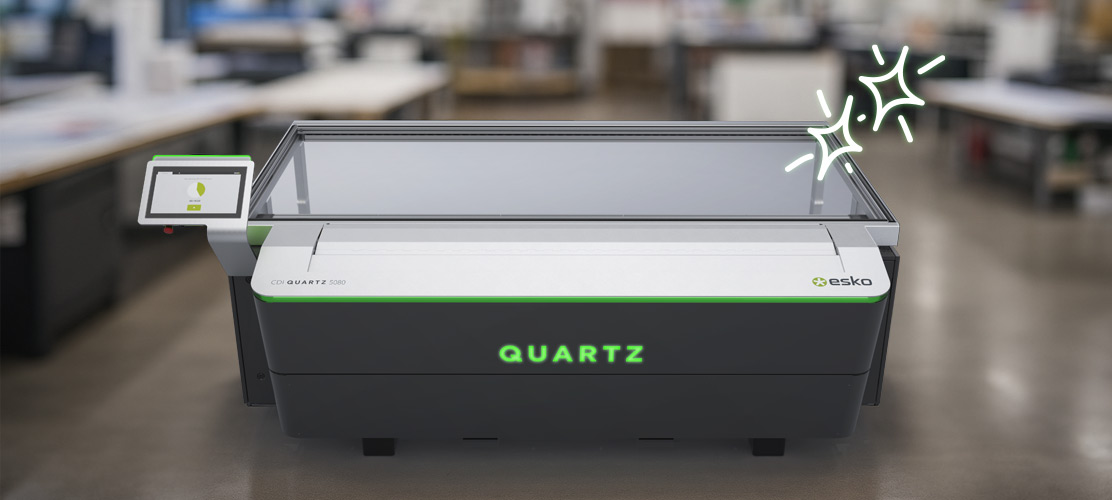
Systems such asXPS Crystal standardize both back and main UV exposure, reducing variability and improving plate-to-plate consistency.
Inci Flex’s automated platemaking line demonstrates how connecting imaging, exposure, processing, and downstream handling in an automated sequence reduces variability and improves plate consistency.
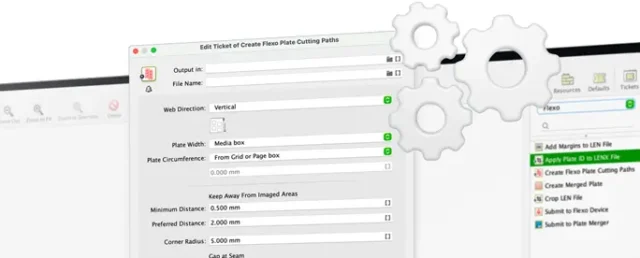
Plate Inspection, Cutting, and Mounting Preparation
After processing, plates should be inspected before they are sent to the pressroom. Plate inspection checks for imaging defects, incorrect dot reproduction, and any physical damage that occurred during processing. Catching plate defects before mounting saves press time and avoids the cost of a failed press start.
Plates also need to be cut to the correct size and prepared for mounting on the print cylinder. Cutting accuracy matters because misaligned plates will cause registration problems on press. Plate identification, linking each plate to the specific job, color, and repeat length it was produced for, is important for managing plate inventory and avoiding mounting errors.
Esko’s Flexo Engine adds automated plate identification and plate cutting to the platemaking process, reducing manual finishing steps and the risk of preparation errors before plates reach the press.
How Do You Create a Reliable Flexo Prepress Process?
Standardized Artwork Specifications
One of the most effective ways to reduce prepress errors and rework is to establish clear, documented artwork specifications and communicate them to all parties who supply files.
These specifications should define:
Accepted file formats and color modes
Minimum font sizes and stroke widths
Bleed, safe zone, and die-cut requirements
Barcode specifications including magnification and BWR
Spot color naming conventions
Image resolution requirements
When artwork is created to a consistent specification, preflight checks are faster, adaptation work is reduced, and the risk of late-stage errors is lower. This matters most for converters that receive files from multiple brand owners or agencies, each with their own design conventions.
Without a clear specification and an automated way to enforce it, every incoming file is a potential source of rework.
Automation Engine supports standardized workflows with automated quality checks and right-first-time proof generation, making it easier to enforce specifications consistently across all incoming jobs.
Press Fingerprinting and Profiling
A press fingerprint is a characterization of how a specific press prints under defined conditions. It captures the relationship between the digital file and the physical print result, including dot gain, color gamut, ink density, and tonal behavior.
Fingerprinting should be done:
When a press is first commissioned
After significant press maintenance or component changes
When ink or substrate suppliers change
Periodically as part of ongoing process control
The fingerprint data is used to create ICC profiles and dot compensation curves that are applied in prepress to ensure that the file is prepared for the actual press condition rather than a theoretical standard.
De Schutter Neroc’s approach to fingerprinting shows how a structured profiling process, combined with a profile database, supports color consistency and more efficient ink usage across a flexo production environment.
Quality Control Before Plate Output
The final check before sending files to the platemaking room is a critical control point.
At this stage, the prepress team should verify:
Correct screening parameters for the plate type and imaging device
Dot compensation curves applied and correct for the press condition
Trapping applied and reviewed
Color separations checked against the approved proof
File resolution and ruling appropriate for the output device
Plate layout including marks, slugs, and registration targets
Before packaging components are released, teams need to validate essentials such as barcodes, text alignment, and color accuracy, and only move forward with components that meet the required standards. That final inspection is what keeps avoidable errors from reaching production.
Bart Tielemans, Business Title Senior Enablement Platform Specialist at Esko
In a lean prepress team, this final check is often the last line of defense before a job reaches the platemaking room. When it is done from memory or habit rather than a structured checklist, errors slip through.
Reducing manual touchpoints at this stage through automation and structured checklists improves accuracy and reduces the risk of errors reaching the platemaking room.